Monday, August 19, 2024

Heart of Christmas 2024 - Week 3


Hello fellow stampers! Welcome back to this week’s Heart of Christmas Stampin’ Up! blog hop. Each week until 25 November 2024 the Art With Heart team will showcase Christmas cards and projects to inspire you to create  your own.

Recently I received a demonstrator paper share from the upcoming September - December Stampin’ Up! Mini catalogue. And wow I fell in love with the Sentimental Christmas DSP! It didn’t immediately grab my eye glancing through the catalogue but looking at these papers in real life they do tick all the  traditional images and colours.


Firstly, I die cut the Basic Beige mat with the Elegant Borders die set just to provide some interest to the panel. Before adhering the panel to the Poppy Parade base I also stamped some ‘twig-like’ branches in Garden Green ink towards the bottom. This stamp is from the Rest Relax Enjoy stamp set and will add a bit more interest underneath the die cut tags.


The two ‘tags’ were die cut from different sides of the Sentimental Christmas DSP using the Greetings of the Season die set. The candy-striped tag was adhered to the mat layer and the Christmas stocking tag adhered with dimensionals to the bottom tag. The sentiment from the coordinating stamp set Greetings of the Season was stamped in Poppy Parade ink and fussy cut.

The card inner has a Basic Beige layer with a candy-stripe strip at the bottom. I have used another sentiment from the same stamp set using Poppy Parade ink again. The red complements nicely with the beige. The little bow was fussy cut and adhered at the top.


To finish the card I adhered a bow tied from Basic Beige ribbon to the tags and also some embellishments coloured with Dark Poppy Parade Stampin’ Blend pen, including Adhesive backed Sparkle gems, Blooming Pearls and Adhesive backed Swirl dots.


Please head on to the next participant for more Christmas inspiration the lovely and very talented Claire Daly.


If at any time you find a broken link please head to the blog of our host, the lovely Sharon Davern and she will have the list of all those participating.

Don’t forget to check back next week for more Christmas projects. Hope you have a fabulous week ahead!

Monday, August 5, 2024

Heart of Christmas 2024 - Week 1


Hello fellow stampers! I’m very excited to welcome everyone to the very first week of the Heart of Christmas Stampin’ Up! blog hop for 2024! Each week until 25 November 2024 the Art With Heart team will showcase Christmas cards and projects to inspire you to create  your own.

Stampin’ Up! have released the latest Mini Catalogue (September - December 2024) to demonstrators only and will be made available to the general public from 6 September. While waiting for the demonstrator pre-order to begin I have made a start on my Christmas stash using current DSP now available under ‘Online exclusives’ section.

The DSP pack I have used in tonight’s cards is Shining Christmas. These papers have foil patterns on one side and matt patterns on the other. The colours in this pack are Cherry Cobbler, Mossy Meadow and Basic White.


For my first card the stamp set used has carried over from the last Sept-Dec 2023 mini catalogue - So Very Merry. I stamped the Santa with Memento Black ink and die cut using a circle from the Stylish Shapes die set. The image was coloured with Stampin’ Blends in Balmy Blue, Cherry Cobbler and Crumb Cake. 


The sentiment stamped with Cherry Cobbler ink is from the same stamp set and die cut with a label die from Greetings of the Season die set (Online exclusives). This stamp and die bundle has a variety of greetings and coordinating dies.

The label die cuts a hole to tie a ribbon or other trim. I tied the Silver & White Sheer ribbon and adhered some silver Adhesive-backed Sparkle gems. Santa and the sentiment were adhered with dimensionals to a DSP layer and then the Basic White card base.


For my second card I adhered the DSP to the Basic White card base. This sentiment is comprised of two greetings from the Greetings of the Season stamp set and then die cut from the coordinating bundle. I have used the same ribbon and sparkle gems as in my first card.


The present has been die cut from white Glimmer specialty paper using the Wanted to Say die set. It’s a bit difficult to see from the photo but it does sparkle in the light! The bow is also die cut from Mossy Meadow card stock.


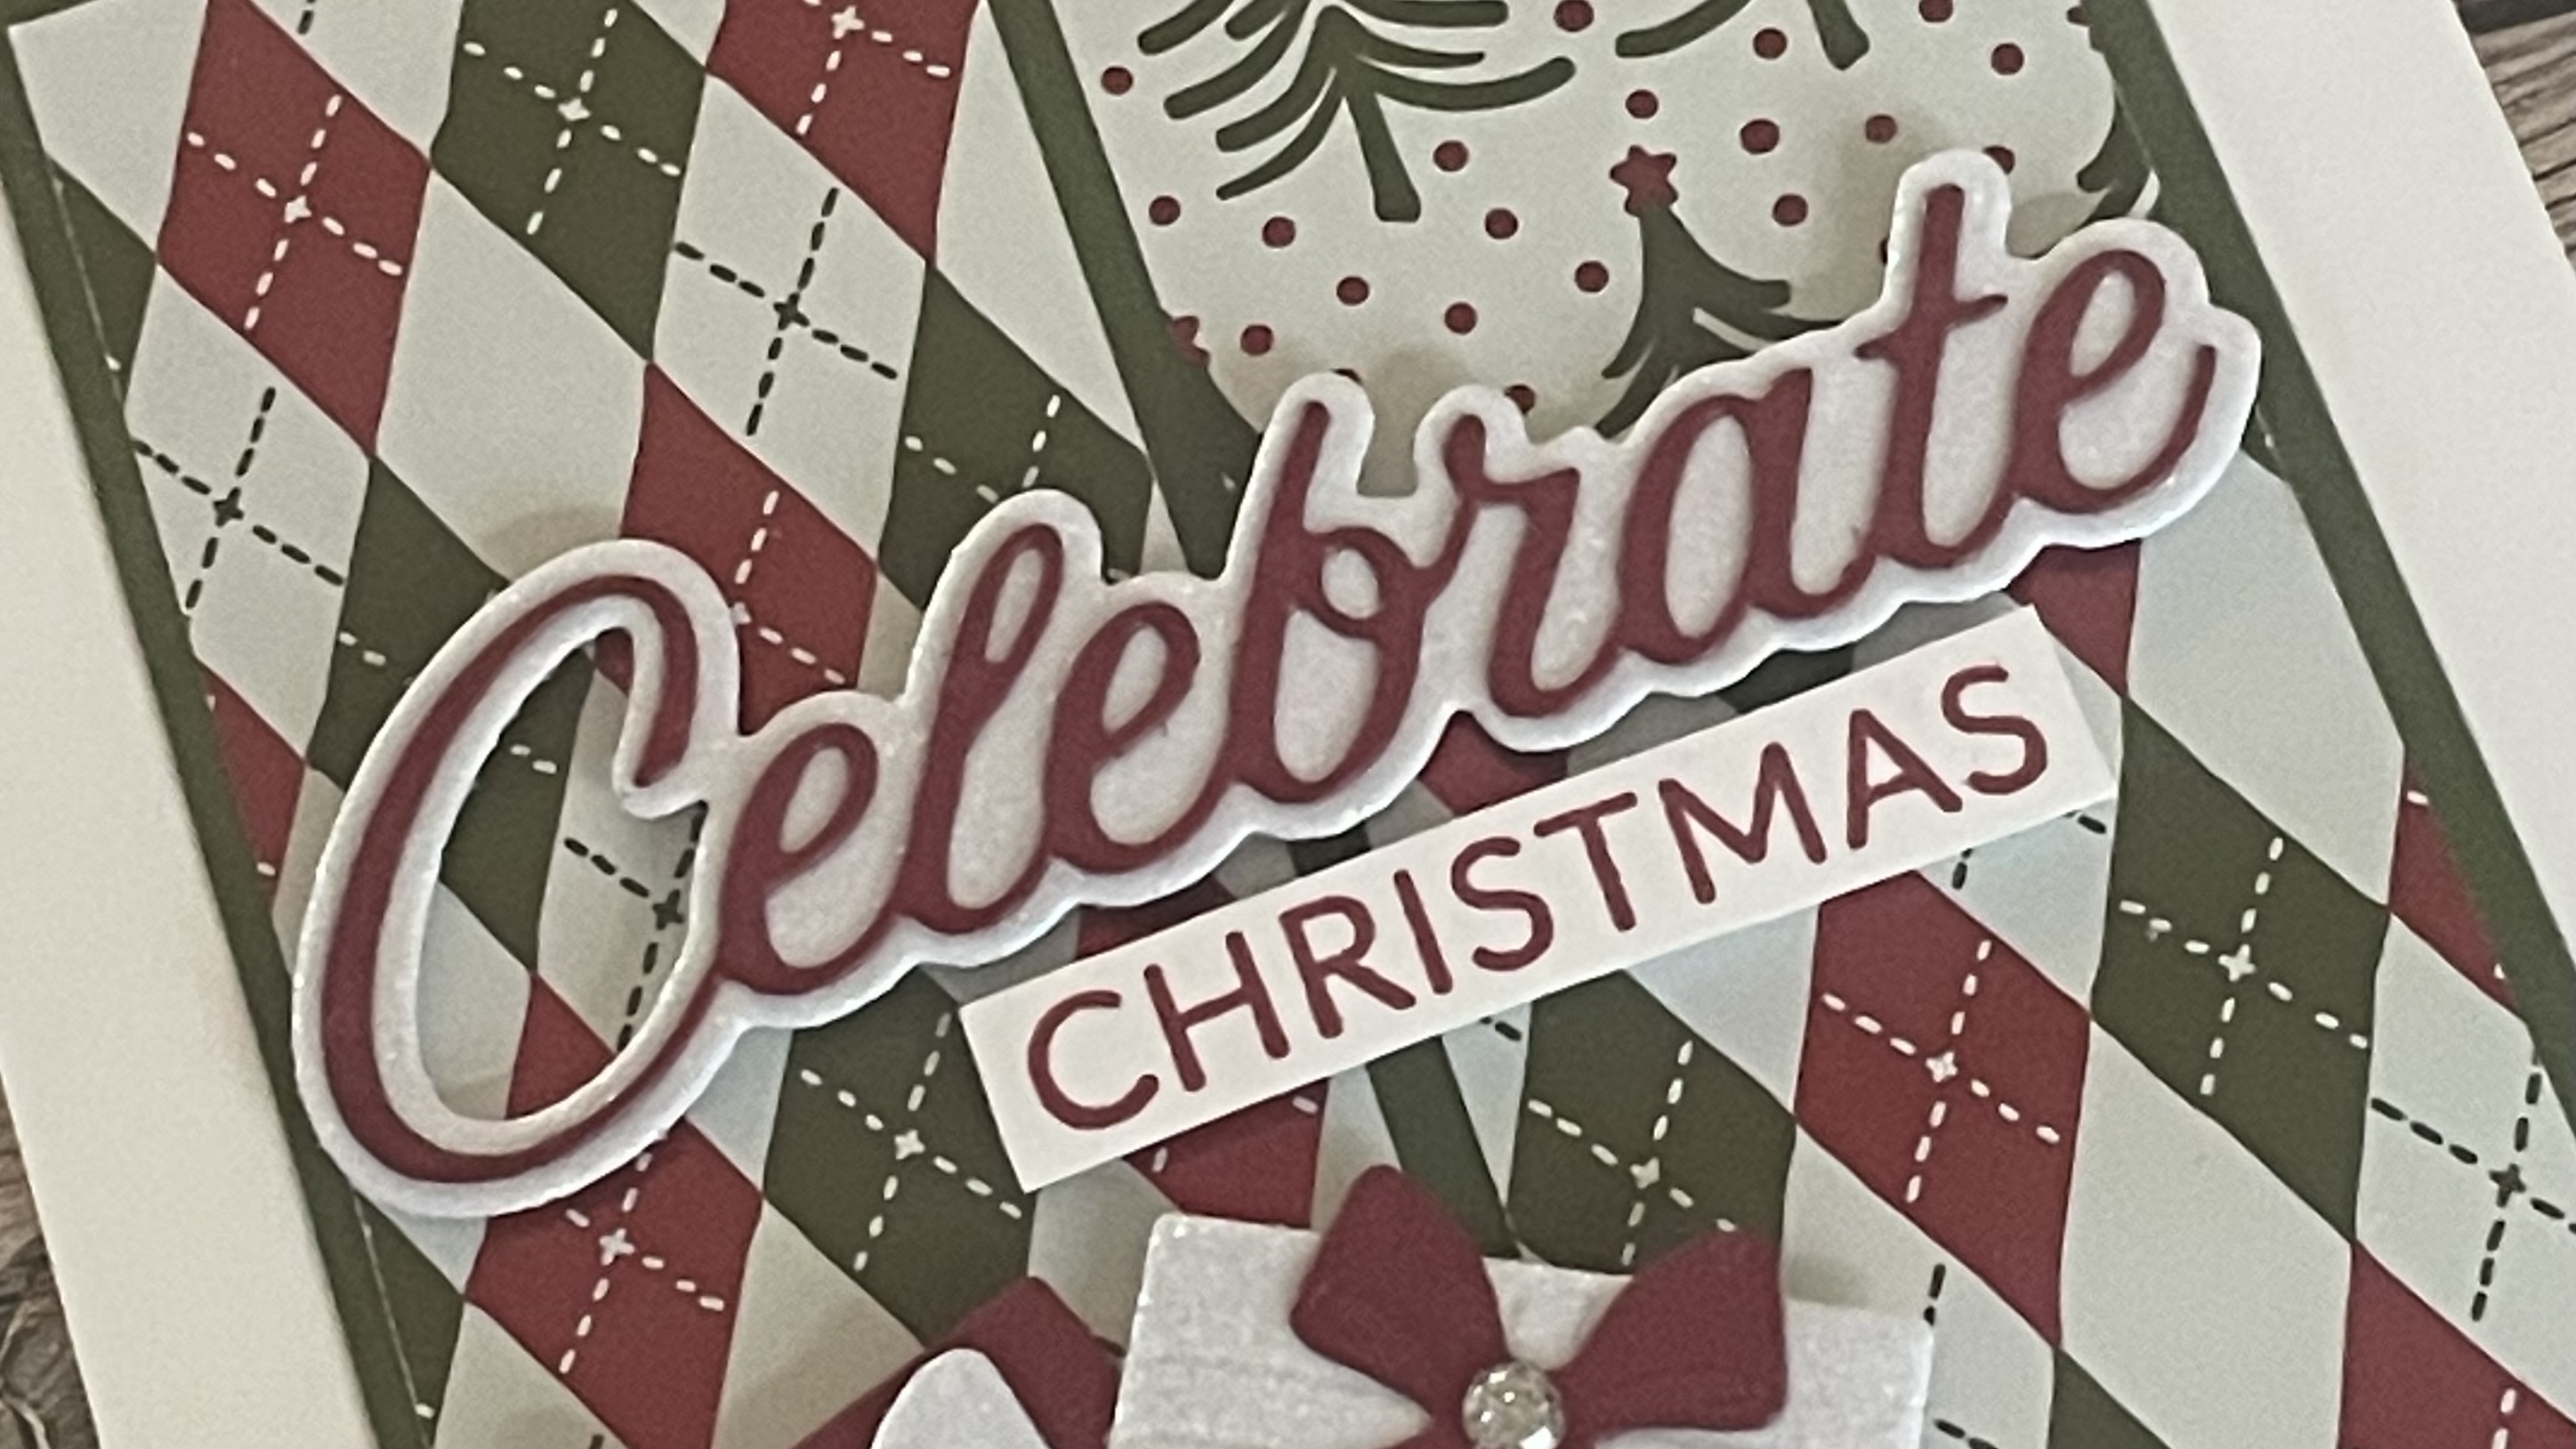
For my last card I CASEd a card template in the Annual catalogue. I’ve cut DSP rectangles and arranged as per layout.
I adhered the layers to a Mossy Meadow mat and then to the White card base.


The main greeting ‘Celebrate’ is from the die set with the present and bow, Wanted to Say. The base is die cut from the white glimmer paper and the word from Cherry Cobbler. I have also die cut and adhered several more presents with bows to the card front.


You can view the foil accents from another angle.


Please head on to the next participant for more Christmas inspiration the lovely and very talented Christine Blain.


If at any time you find a broken link please head to the blog of our host, the lovely Sharon Davern and she will have the list of all those participating.

Don’t forget to check back next week for more Christmas projects. Hope you have a fabulous week ahead!
Wednesday, July 31, 2024

Colour Creations Bubble Bath - Week 14


Hello fellow crafters! Welcome to the Colour Creations blog hop where team members of the Art With Heart Stampin’ Up! demonstrators showcase a new colour every Wednesday. This week our featured colour is Bubble Bath. A lovely soft pink that can be found in the Subtles colour family.


Bubble bath is a great choice for creating cards to welcome a new baby girl! For this reason I chose the Cutest Onesie bundle that includes a onesie, baby rattle and coat hanger. 


I have CASED a card from a fellow demonstrator Cornelia Burger, to create a set of drawers. I changed the design slightly so that instead of the entire card front being the drawers I created the standing drawer set.


I adhered a DSP layer from the Country Woods collection to the Bubble Bath card base. To make my drawer set I cut a smaller panel from BB card stock and then die cut one end to create the ‘legs’. I used one of the label dies from Unbounded Love die set.


For each drawer I cut rectangle panels from the Bright & Beautiful DSP. These panels were adhered with dimensionals to allow the coat hanger holding the onesie to hook over them. These coat hangers are so cute! When you die cut the onesie it also cuts a slit to allow the coat hanger to slide into.


The sentiment from the Cutest Onesie stamp set was stamped with Bubble Bath ink and die cut with a label die from the Unbounded Love die set. This die set has many label dies in different shapes and sizes and has been my go to set since I received it!


The drawer handles are the Petunia Pop 2024-26 In Color Resin Dots.


The card inner. The sentiment has been stamped with Fresh Freesia ink and the hearts with BB ink. I’ve added a strip of DSP and the die cut numbers.


Hope you enjoy the remaining blog hop where you can find more Bubble Bath inspiration from the very talented Rachel Palmieri.


If you find a broken link or have come to this blog hop from a different entry point, you can view the full list of participants on Cathy Proctor blog. 

Thank you so much for stopping by and enjoy the rest of your week and happy crafting.

Wednesday, July 24, 2024

Colour Creations Boho Blue - Week 13


Hello fellow crafters! Welcome to the Colour Creations blog hop where team members of the Art With Heart Stampin’ Up! demonstrators showcase a new colour every Wednesday. This week the featured colour is Boho Blue and one of the 2023-25 In Colours.


I love this blue as it is a darker hue than Balmy Blue yet still a ‘softer’ colour and not as bold as some of the other blues. I have made two cards for this weeks blog hop.


The first card created is a slimline card featuring the Mediterranean Blooms DSP. This DSP has images of oranges or lemons on one side and the other side with blue-toned patterns reminiscent of Mediterranean tiles which has influenced my card design tonight.


I have die cut several DSP ‘tiles’ with the square Stylish Shapes die and then mounted onto Boho Blue card stock. These were adhered to a Basic White mat with dimensionals and then to the card base. The blue and white patterned tiles were decorated with fussy cut lemon branches.


The sentiment stamped with Boho Blue ink is from the So Sincere stamp set and die cut with a label die from the Unbounded Love die set. I have finished off my card with Misty Moonlight Adhesive-backed Pearl Trio embellishments.


For my second card, a DSP layer was adhered to the Boho Bluef card base. The arch was die cut using the Garden Meadows die set and adhered with dimensionals to provide a 3D layer. I could also tuck a lemon branch fussy cut from the edge of the DSP so as not to waste any images! I also applied Boho Blue ink with a Blending Brush to the arch layer for a softer effect.


The sentiment stamped with Boho Blue ink is also from the So Sincere stamp set. I have die cut the sentiment and some Boho Blue card stock using the small scalloped die from the Unbounded Love die set. This die cuts two pieces allowing you to mix colours for the frame.

I adhered some sponged white Diagonal Trim Combo Pack behind the sentiment.


Hope you enjoy the remaining blog hop where you can find more Boho Blue inspiration from the very talented Di Furniss.


If you find a broken link or have come to this blog hop from a different entry point, you can view the full list of participants on Cathy Proctor blog. 

Thank you so much for stopping by and enjoy the rest of your week and happy crafting.

Wednesday, July 10, 2024

Colour Creations Blackberry Bliss - Week 11


Hello fellow crafters! Welcome to the Colour Creations blog hop where team members of the Art With Heart Stampin’ Up! demonstrators showcase a new colour every Wednesday. This week we showcase the colour Blackberry Bliss and that is part of the Neutrals colour family. 


This week I wanted to make a card using the Thoughtful Journey DSP. I love this DSP with water-coloured nature scenes one side and splashes of various watercolour inks on the other side of the DSP. The fancy fold ‘tent’ card I have made makes use of the nature scenes by allowing the recipient to view it through a cutout on the front of the card.


The Basic White card stock base was scored in half to create a standard card. I then scored a 10.5cm x 7cm panel to create a ‘W’. The 1cm end is tucked behind the DSP on the inside with Tear and Tape adhesive.


Next I used the Deckled Circle dies to die cut the Basic White layer with the smaller circle and then the card stock/DSP layer with the larger circle die. This allows the white frame to show through. I thought it looked better when viewing the scene through the aperture.


I stamped the front DSP with little butterflies in Blackberry Bliss ink using the Sketched Butterflies stamp set. The butterflies adhered to the front panel the coordinating die set and were die cut with Blackberry Bliss card stock. These were adhered with dimensionals.


The sentiment was stamped in Blackberry Bliss ink onto Basic White card stock. I die cut the sentiment using this cute scalloped die from the Unbounded Love die set. It cuts a rectangle label and scalloped frame separately. Brilliant! You can mix and match your colours!


Some Linen thread was adhered behind the sentiment and the card was also embellished with some Petunia Pop Adhesive backed Pearl Trio.


Hope you enjoy the remaining blog hop where you can find more Blackberry Bliss inspiration from the very talented Theresa Gerrard.


If you find a broken link or have come to this blog hop from a different entry point, you can view the full list of participants on Cathy Proctor blog. 

Thank you so much for stopping by and enjoy the rest of your week and happy crafting.

Heart of Christmas 2025 - Week 12

  Hello fellow stampers! Welcome back to this week’s  Heart of Christmas   Stampin’ Up! blog hop for 2025! Each week until 24 November 2025 ...